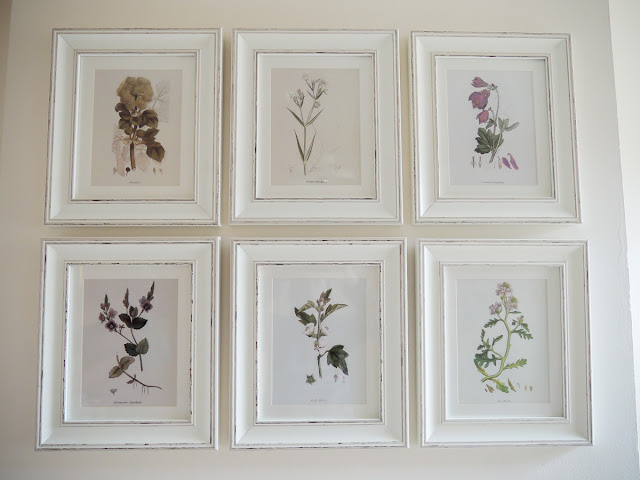
I was watching the TV programme ‘The Good Wife’ a few years ago and I noticed the lovely feature wall in Alicia's apartment. It was covered in uniform frames of botanical flowers - and I loved it. I’ve been waiting for an opportunity to re-create this wall art ever since, and now I have a new craft room I thought this would be an ideal opportunity! It was quite by coincidence that when hubby’s lovely Grandmother Joan passed away a couple of years ago, Grandpa gave me a beautiful set of botanical prints that once belonged to her. I was so touched by this - as not only could I make a beautiful wall of art filled with flowers and nature, but it would also be a lovely way to remember Joan, who aside from being a keen nature lover and gardener, was also a crafty soul herself.
Aside from giving you tips on sourcing botanical prints, I'll also show you the easiest way to hang pictures in a row. I don’t know about you but when it comes to hanging pictures I’m usually awful. I always seem to make 10 holes before I'm happy with it's placement! So below is a super easy way hang pictures easily. Safety note. Wires and pipes are often running just behind walls, and hammering into one of these could have a severe consequences. If you aren't sure whether it's safe there are some great little battery-operated wire detectors you can buy from as little as £6. It's better to be safe than sorry.
What you need
Picture frames with mounts
Picture hooks and hammer
Newspaper or big sheet of paper
Botanical prints
Newspaper or big sheet of paper
Botanical prints
Where to buy botanical prints
Botanical prints can be expensive and hard to come by. You can by them individually, or keep your eyes peeled in charity and book shops for sets of them. Here's a few links to some that I found ....
Set of 10 James Sowerby prints (similar to mine).
Step 1
Pop your botanical print in the picture frame (pop a piece of sellotape on the top edge to keep it in place.) That's the hard bit, now when your ready to hang! Lay a piece of newspaper on your table, and place your frame on top and draw around it - then cut it out. Do this with each frame. I ended up with 6 pieces of paper.


Step 2
Now we want to mark where the nail will go on our piece of newspaper. To do this, lay the ruler across the width of the frame and mark the centre with a dot (on the ruler - see below.) Then do the same measuring from the top of the frame to the centre. Then mark these same points onto the sheet of newspaper and mark with a cross.


Step 3
Using masking tape, get your pieces of paper onto the wall and adjust them until you’re happy with their placement. Then simply hammer your nail into the wall where the cross is! Take the paper down and pop your pictures up - you should be left with perfectly alighted pictures. Tada!
TADA!
JM x


No comments:
Post a Comment